How to Export Recorded Voice in MP3 Format from Audacity?
Audacity is a popular open-source audio editing software that is available for free on Windows, Mac, and Linux. It offers a wide range of features for recording, editing, and exporting audio files. One of the most common tasks that users perform in Audacity is exporting their recordings in a specific file format, such as MP3.
In this article, we will show you how to export your recorded voice in MP3 format from Audacity.
Exporting an audio file in Audacity involves a few simple steps. However, before you begin, make sure that your recording is complete and that you have saved your project file. Then, follow these steps to export your recording in MP3 format:
Step 1: Select the region you want to export
If you want to export your entire recording, skip this step. However, if you only want to export a specific section of your recording, you can select it by clicking and dragging your mouse over the desired area in the waveform display. You can also use the Selection Tool (shortcut key: F1) to make precise selections.
Step 2: Choose the export format
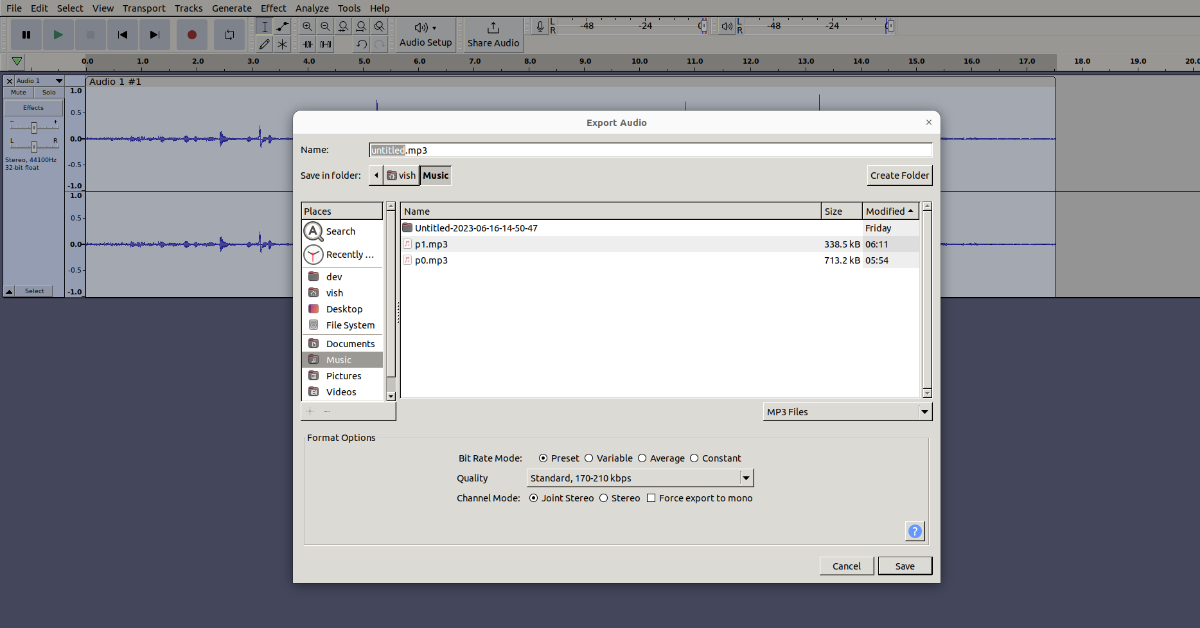
To export your recording in MP3 format, go to the File menu and select “Export.” This will open the Export Audio dialog box. From here, you can choose the format you want to export your audio file in. In this case, select “MP3 Files” from the “Save as type” dropdown menu.
Step 3: Configure the export settings
After you have selected the MP3 file format, you will see a number of export settings that you can configure. These include the bitrate, quality, and other settings that affect the quality and file size of the exported audio file.
Bitrate: The bitrate determines the amount of data used to represent the audio signal. Higher bitrates result in higher-quality audio, but also larger file sizes. Choose a bitrate that is appropriate for your needs. For speech recordings, a bitrate of 64 kbps or 96 kbps is usually sufficient. For music recordings, a bitrate of 128 kbps or higher is recommended.
Quality: The quality setting determines the degree of compression used to encode the audio file. Higher-quality settings result in less compression and higher-quality audio, but also larger file sizes. Choose a quality setting that is appropriate for your needs. For speech recordings, a quality setting of 4 or higher is usually sufficient. For music recordings, a quality setting of 6 or higher is recommended.
Other settings: You can also configure other settings, such as the channel mode (mono or stereo), the sample rate, and the ID3 tags (metadata) for the exported file.
Step 4: Choose the export location and file name
After you have configured the export settings, choose the location where you want to save the exported file and give it a name. Make sure that you choose a location and file name that are easy to remember and locate.
Step 5: Export the file
Finally, click the “Export” button to export your recording in MP3 format. Depending on the length and complexity of your recording, this process may take some time. Once the export is complete, you should have an MP3 file that you can use for your podcast or other purposes.
Exporting your recorded voice in MP3 format from Audacity is a simple and straightforward process. By following the steps outlined in this article, you can quickly and easily export your recording in the desired format. Remember to pay attention to the export settings, such as the bitrate and quality, to ensure that you get the best possible audio quality for your needs.
With Audacity, you have a powerful and flexible tool for recording and editing audio, and exporting your recordings in MP3 format is just one of the many things you can do with this versatile software.


